Raising Cactus From Seed
Introduction
Growing cactus from seed is not terribly difficult, although it does take purpose and patience. Any attempts to
grow cactus from seed haphazardly will seldom result in mature plants. And so it is in nature. Many thousands of
seeds are produced for every one plant that reaches maturity. Fortunately, we can improve those odds substantially by following a few
tried and true methods. This article is intended as a general overview of seed propagation and I do not claim that the method described herein is the only
way to do this nor do I claim it is superior to other methods. Rather, this is just one method that has produced positive results. It is my goal to encourage
other cactus enthusiasts try their own hand at seed raising. I, myself, have learned the methods described below from more seasoned growers after failing miserably
doing it on my own. I still don't consider myself an expert on the subject and on that note you should not be discouraged if you don't get it right the first time.
Why Seeds?
It is well known that many cactus plants can be propagated easily from offsets or cuttings. Larger or full grown plants are also available at many nurseries or via
mail order. So why grow cactus from seed?
Growing cactus from seed has several advantages...
Here are a few of them:
- Seeds are inexpensive - often only a few cents for a pack or free if you collect them from your own plants
- You have lots of plants to trade or give away to friends
- You can get species and varieties not available as plants
- You get more variation than with cuttings - and you get first pick of the plants too
- You can see the whole life-cycle of your plant
- Seeds can be mailed much easier than plants
Recognizing these benefits, there are also some disadvantages, the biggest of these being time. If you want to see flowers on a given plant, it may take many years to
reach blooming size from seed in some species. Even those that flower early, will take at least a year before blooming. Others will bloom in around 3 years or so. It is also generally true that seedlings are harder to keep alive than adult plants. Very often seedlings cannot handle the same temperature variations, light intensities, pest attacks, or other challenges that
mature cactus plants can easily survive.
So you must consider these pros and cons, but remember that many others have done this already. By reading articles like this one and connecting with other growers,
you can increase your chance of success considerably. If you do, I think you'll agree that the pros outweigh the cons.
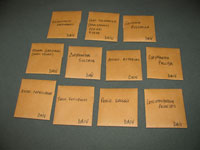
Seed Packs from the CactiForum Seed Depot
[Note: You can click any of the the images in this article to enlarge them.]
Getting Started
The first thing we need to sow seeds is some pots. Seedlings are very small and grow fairly slowly, so 2inch pots are sufficient. There seems to be an unwritten philosophy among seed growers that the cheaper the seed growing setup the better. This is not to skimp on meeting the needs of the seedlings, but to do utilize existing materials as much as possible. One of the ways to raise seeds on the cheap is to reuse pots.
Another way is to use leftover food containers or other similar items. In this case, I had a number of small plastic tubs that mealworms come in for feeding my reptiles. These containers did not have holes in the bottom, so I drilled some. As we will see later, the seedlings will be in 100% humidity and therefore drainage holes are useless. I added
them because I wanted to be able to keep the seedlings growing in the same pot as long as possible to avoid early transplanting risks. If I were to transplant them immediately after moving them to an open air environment, then I would have skipped the holes.
When reusing pots, it is important to clean them to avoid potential fungus, algae, or other pests that may quickly kill delicate seedlings. Taking some precautions up front
to prevent pests and disease is far easier than trying to fend off threats after germination. Cactus seedlings are especially sensitive when small and fungicides or insecticides
can kill or weaken the cactus seedlings. Some people add a mild fungicide when sowing, but proper sterilization should eliminate the need for this. To clean the pots, I soaked them
in bleach water for a good while and then rinsed them thoroughly
Next, we need to prepare some soil. I use my standard cactus soil mix and sift out the larger pieces. You can read about cactus soil mixes
on this page. I found a child's beach toy to be a perfect tool for this job. Of
course, the soil must be dry in order to sift it. After the large parts are removed, I wet the soil so that it is damp throughout, but not soggy. Then the soil goes into
the microwave for 4-6 minutes depending on how much soil there is. This is to sterilize the soil and kill any potential threats to the seedlings. It is best to stop
partway through and mix the soil. Be careful as it can be very hot in parts and cool in others. Some people bake the soil in an oven for the same purpose.
Again, using your typical soil mix won't work for every species, but should be fine on more common species. When you get into some of the more challenging species,
your best bet is to seek out advice from other growers that have tried that same species. Some species are extremely slow and will be in the seedling environment
for well past a year. Some species will not tolerate the same amount of organic material as others.
After the soil has cooled some, we are ready to fill our pots. It will cool even more as you do this. I use an empty pot as a scoop and fill the pots right
to the top. Once filled, I tap the pot and smooth out the surface with my finger. This prevents the seeds from falling down any large gaps in the soil surface. Then
I sprinkle the seeds evenly over the surface of the soil. In the picture below-right, I pointed out a couple of the seeds using red arrows. The green arrows are
pointing to fertilizer. I like to use a time release fertilizer like Osomocote as it will slowly release as the seedlings grow. Note: This process can be a bit messy
so I used a flat cardboard box as a work tray. When finished, I just dispose of the cardboard and clean-up is done.
Unless you are one of the few growers who don't care about names, it is critical that you carefully label the pots as you go. Seeds and seedlings can look very
similar for the first few years. Even at maturity, some species are a challenge to ID properly without knowing the origins of the seeds. Melocactus are one example
in particular, but there are many others. There are several ways you can go about this and most people put a tag in the pot with the full plant name and collection number
if applicable. In my case, I numbered the pots on four sides. Then I entered the names with the corresponding number in a spreadsheet on my computer. In this way,
I can easily update it with notes as germination occurs or when I transplant them later on. Often people keep track of the number of seeds sewn and monitor the germination
rate for each one. I didn't do that this time, mostly because I forgot!
After the seeds are in place, I take some of my sifted soil pinched between my fingers and sprinkle it over the seedlings until they are just covered. It is not necessary
for the seeds to be covered, but helps to support them once they start to grow. Each species is different and some need light to germinate so consult the CactiForum if you are unsure about this. At this point, I take a spray bottle and give the plants a good soaking. The soil is already damp from our pre-microwave
wetting and now I saturate it until the water just drips out the bottom. Be careful to use only a light spray for this or you might wash the seeds right out of the pot.
For this article, I chose to use the "baggie method" which is a popular technique among growers worldwide. In this way, I place each pot of fresh-sown seeds in a
ziplock baggie and seal it shut. This method has several benefits. It eliminates the need for watering as the moisture will condense inside the bag and soak back into the soil providing a constant moist environment for the seedlings. This kind of environment works best for most cactus seedlings despite the fact that it would quickly kill a
mature cactus. A second benefit is that the sealed bag keeps out undesirables like fungus, gnats, or other pests. Even if you sterilize the soil and pots as we did
earlier, if the pot is not sealed, many pests will find the warm/moist environment too good to pass up. And they will find the tender green cactus seedlings to
feed on just an added bonus!
Seedlings will appreciate bright light, but will not do well in full sun. The sun is too strong for almost all seedlings and in the wild they usually start growing in the
protection of a rock or other plant. With this caution in mind, placing the pots in a bright spot under a shelf in the greenhouse or in a window that gets sun for only part of
the day is a good option. For even better control, however, artificial lighting is ideal. You can find more information on which lighting setup to use for seedlings at the
end of the artificial lighting article. In my case, I used two lighting hoods that I already had for keeping reptiles with a
compact florescent bulb in each one. For a propagator, I kept with cheap-seed-raising tradition and used a 10 gallon aquarium that I already had. I used a piece of stiff cardboard for a lid and cut holes in it for the light domes. Since the pots are in baggies, I do not have to worry about keeping the whole propagator humid or sealed up. Since the aquarium is clear glass, much of the light that should be going to the seedlings is escaping into the room. This was easily remedied by taping some white scrap paper around the outside of the tank to reflect the light back in.
I stuck a thermometer at one end and cut out the paper so that I could see it without opening the propagator. Most cactus seedlings like a temperature of 70F - 90F to germinate. This
is a general statement, of course. Some species, such as Ferocactus may not germinate at the low end of that and you'll have to turn up the heat. Many people use a
heating pad on the bottom for controlling temperature. If you do, be sure that you use it in conjunction with a thermostat or it could overheat quickly.
Conclusion
Hopefully, in this brief article, I've been able to inspire you to give seed raising a try. As you see, there is a bit more effort required than just picking a
cactus off the rack at a nursery. Some thought needs to go into the process along with taking the proper precautions. If at first you don't succeed, adjust
your methods and give it another try. Start with common species and get advice from other growers. Finally, if you're on a tight budget, your frugal and innovative approach
will be admired by even the most expert seed-sower.
Author: Daiv Freeman
|


;)
;)
;)
;)
;)
;)
;)
;)
;)
;)
;)
;)
;)
;)